How To Connect Xfinity Remote To Tv?
Specifically, this article will guide you on how to connect an Xfinity remote to your TV by following these easy steps.
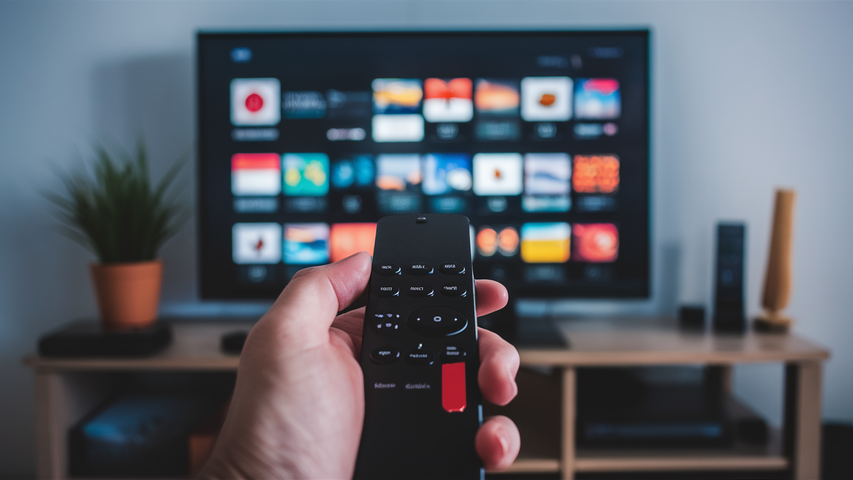
One of the most popular questions on how to connect the Xfinity remote to the TV is a simple process through which you can use the Xfinity remote to perform the power, volume, and channel options instead of using the television remote. This is advantageous in that it allows for the use of only one remote for cable box and TV operations. Here is a step-by-step guide to connecting an Xfinity remote to your TV:Here is a step-by-step guide to connecting an Xfinity remote to your TV:
Preparation Before connecting your Xfinity remote, make sure you have the following:Before connecting your Xfinity remote, make sure you have the following:
- Xfinity remote
- Television that you wish to sync the distant with
- Some people like to have access to the rear of the television.
- A TV remote control (in order to confirm that the television is on the correct channel).
Get Your TV Ready The first step to follow is ensuring that your television is switched on and is on the right input, corresponding to your cable box.
- Power on your television using the power button key on the television supplied remote or the television set.
- To get to this menu from your TV, use your TV remote and press the Input or Source button. This leads to a pop-up menu that displays the various options of inputs available for your television set, for example HDMI 1, HDMI 2, Component and others.
- Make sure that you have your cable box turned on with the current selected to an active channel. Then choose the input option which displays the picture from the cable box you have installed at your home. Some of the examples of inputs that are commonly used are HDMI 1, Input 1, Component 1, among others You can check from your TV’s remote control which specific input or input number corresponds to whichever device port where you have connected your cable box.
- You have correctly chosen the right source and now have your television set correctly set up for pairing the Xfinity remote cable box.
- Now How Do I Connect Xfinity Remote to My TV Using Cable Box Now that your TV is powered on and set to the cable box input, we can connect the Xfinity remote:Now that your TV is powered on and set to the cable box input, we can connect the Xfinity remote:
- Power on your cable box if it is not powered on yet to enable the connection to the cable system.
- To reset the Xfinity remote, first, you need to find the Setup button on the remote control which is marked with an ‘A’ or an ‘OK’. Then, you need to press and hold this button until the light at the top of the remote shifts from red to green.
- After the light blinks green, turn on the cable box using the Xfinity remote and try changing the channels to confirm the connections.
- Press and hold Setup button again until you see the good light at the top of the Logitech remote blink green two times.
- Next, try functions such as power, volume, and mute to ensure that the Xfinity remote is working appropriately to manage the TV. A Volume+ button increases the volume and mute control audio from the TV speakers while a Power button turns the whole TV set on or off.
After the steps above has been followed, your Xfinity remote is directly synched with your television set through the cable box interface. Now you can make the convenience of one remote in changing the signal and working associated with the cable box channel functions along with the basic features of your Television!
Using the Xfinity Remote to Pair with the TV with help of IR/infrared. If step 5 above did not work, then you will have to directly point the Xfinity remote to your TV and set it to connect through the IR/infrared.
- Click on the TV brand button and enter the code number from the on-screen guide – press Setup until you see a green light. Alert the press, press 9-1-1 on the remote.
- To select your manufacturer code, press the arrow key or Channel +/- keys and scroll up and down the list on the screen till you get the TV brand. Then, jot down the 3-digit code that is listed next to your brand. In some cases, it might be necessary to run one or more of the listed code numbers.
- Dial three digit number and then press the Setup button to confirm the code. It blinks green two times when properly synchronised to the box.
- Check if power/volume/mute keys are now functioning as expected on the TV. If yes, then, hurray, the code is working as expected!! If not, repeat steps 2 and 3 to input another manufacturer code to perform further test.
- After setting a working code, press the Setup button once more, until the status light starts blinking green twice. It is important to note that the Xfinity remote is not programmed to a cable box but rather synchronizes with the TV directly through an IR signal.
Tips and Tricks Here are some helpful tips to ensure successful setup:Here are some helpful tips to ensure successful setup:
- This is because when testing buttons, the remote should be pointed directly at the cable box or TV. The IR signal requires visibility, thus must have a clear line of sight.
- If no code works, try to go to the internet with an appropriate search query, such as ‘Xfinity remote setup’ and the TV’s model number. It is usually possible to find recommended codes online especially for some obscure brands.
- New batteries in the remote guarantee high ability of the device to emit the IR signal. This means that if the batteries are weak, it will affect the connectivity of the devices in the IoT network.
- If an attempt to use cable box fails the following steps, then the only way left is, the IR depending on equipment. Older TVs may not have the compatible control protocols as those found on modern smart TVs.
- Troubleshooting Problems If the remote won't control TV functions after setting up, here are some troubleshooting steps to take:If the remote won't control TV functions after setting up, here are some troubleshooting steps to take:
- If an error was made during the connection process, the connection steps have to be repeated and to reset the connection one has to hold the Setup button until a green light is observed.
- This is done to ensure that the batteries’ strength is well checked because nearly dead batteries do not supply enough power to the IR.
- If codes were not entered properly, enter them again. It is very important to make sure the entered brand code is correct for your TV thrice.
- When using power/volume/mute, set up the remote by ensuring it directly points at the front sensor of the IR TV.
- If possible, place the cable box nearer to the TV and try to decrease the number of barriers between the box and the remote control and the IR sensor.
Sometimes they just do not have compatibility requirements of some specific TV models. If, after several attempts at setting the Xfinity remote to control power/volume, the desired function is still not possible, the TV itself may not support it – using universal remotes is the way to go.
Take Command Of Your Xfinity Remote So if you are wondering how to pair your Xfinity remote with your television, then this is how to do it. This can make you get the feel of having a single programmable smart remote within minutes to control your home theater. Enhanced volume, power as well as input selections are other features you are likely to find entertaining since they provide more convenience to your viewing. Indeed, it becomes easy to set up once you have an understanding of these steps to get it to pair. Therefore, pick on your accessories and start connecting for better control and fun while watching your cable programs!
Ready to elevate your home entertainment? Call us now at +1 844-345-0888 to explore the best Xfinity plans for your home! Enjoy fast internet and premium TV options. Don’t wait—get connected today!